

 www.pinterest.com ```html
 Introduction: Building Your Own Shed Roof Truss Embarking on a DIY shed building project? A crucial component is a sturdy and well-constructed roof. This guide will walk you through the process of building your own shed roof trusses, step-by-step, ensuring a strong and reliable structure for your shed. This method focuses on a simple, common design suitable for small to medium-sized sheds.
Materials and Tools Before you start, gather your materials and tools. Accurate measurements and proper tools are essential for a successful outcome. Here's what you'll need:
- Lumber: Typically 2x4 lumber for smaller sheds, 2x6 for larger spans. Calculate the length needed for the top chords, bottom chord, and webbing (vertical and diagonal supports).
- Plywood gussets: 1/2" or 3/4" plywood, cut into triangles or rectangles for joining the lumber pieces.
- Construction Adhesive: Strong adhesive specifically for wood.
- Screws or Nails: Exterior-grade screws or nails suitable for wood construction.
- Measuring Tape: For accurate measurements.
- Pencil: For marking cuts.
- Circular Saw: For cutting lumber.
- Jigsaw (optional): For cutting plywood gussets if not pre-cut.
- Drill/Driver: For driving screws.
- Hammer (if using nails): For securing nails.
- Safety Glasses: Protect your eyes.
- Work Gloves: Protect your hands.
- Speed Square or Framing Square: Ensuring accurate angles.
- Clamps: To hold pieces together while adhesive dries.
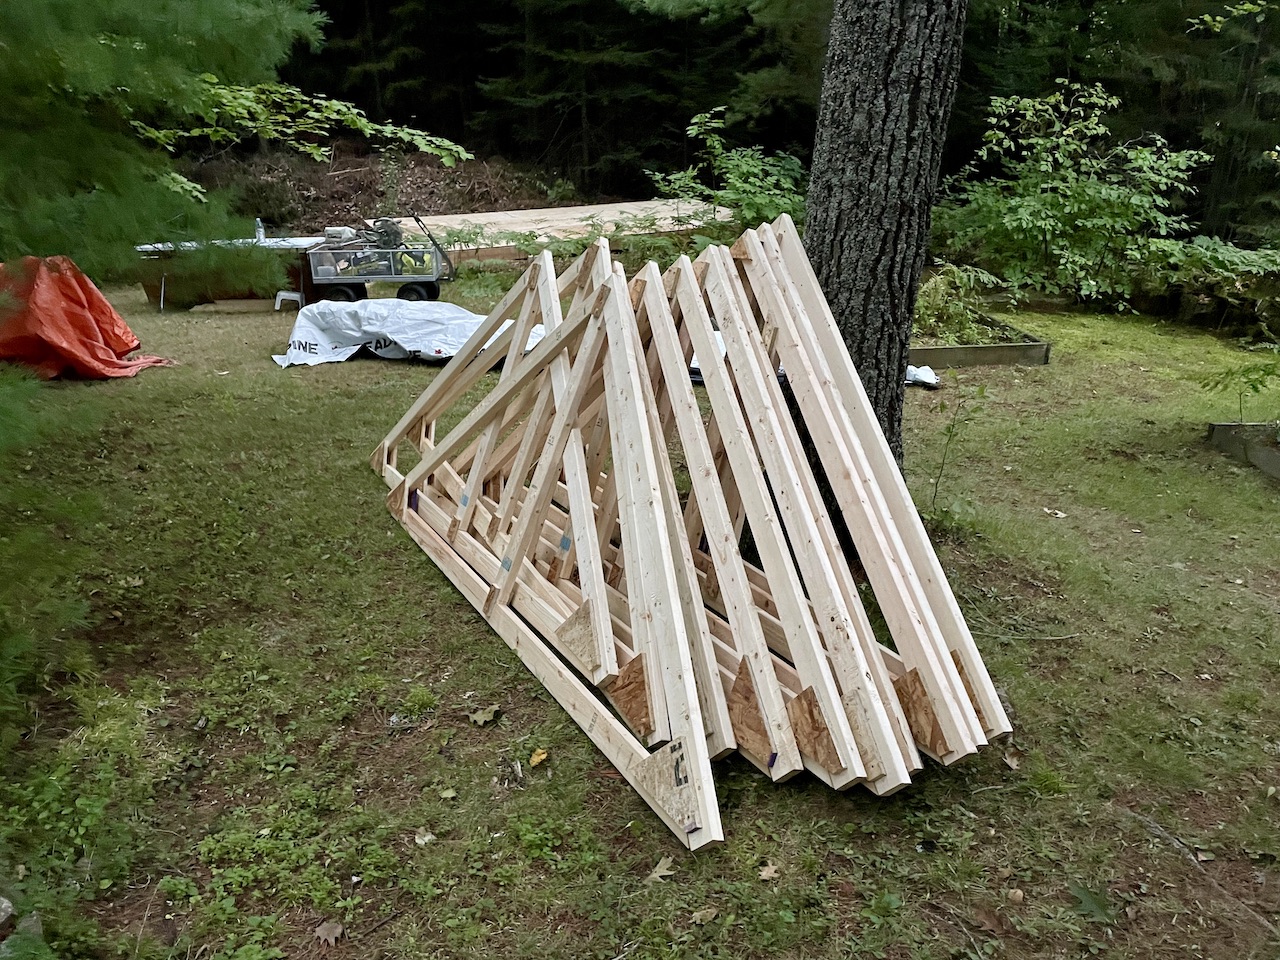
Step 1: Determine Truss Dimensions and Angle The most important step is determining the dimensions of your trusses. This will depend on the size of your shed and the desired roof pitch. Common roof pitches are 4/12, 6/12, or 8/12 (rise over run). Once you've chosen your pitch, use trigonometry or a rafter table to calculate the angle of the top chords. A simple method is to use an online truss calculator, inputting the shed width, roof pitch, and desired overhang (if any). This will give you the lengths of the top chord, bottom chord, and the height of the truss at its peak.
Step 2: Cut the Lumber Now that you have your dimensions, it's time to cut the lumber. Using your circular saw, carefully cut the top chords, bottom chord, and webbing pieces to the lengths calculated in the previous step. Ensure that your cuts are straight and accurate. A miter saw can also be used for precise angle cuts on the top chord if needed. Double-check your measurements before cutting to avoid wasting lumber.
Step 3: Assemble the Truss Frame Begin assembling the truss on a flat, level surface, such as a garage floor or a large workbench. Position the top chords and bottom chord to form the basic triangular shape of the truss. Use your speed square or framing square to ensure that the angles are correct. Temporarily clamp the pieces together to hold them in place.
Step 4: Install Webbing (Vertical and Diagonal Supports) The webbing provides crucial support to the truss. Cut vertical and diagonal supports from your lumber and position them within the truss frame. The exact placement of the webbing will depend on the span of your truss. For smaller spans, a single vertical support at the center of the bottom chord might suffice. For larger spans, you'll need multiple vertical and diagonal supports to distribute the load. Ensure the webbing pieces fit snugly between the top and bottom chords.
Step 5: Attach the Gussets Apply construction adhesive to the areas where the gussets will be attached to the lumber. Position the plywood gussets over the joints where the top chords meet the bottom chord, and where the webbing connects to the top and bottom chords. Secure the gussets with screws or nails, ensuring they are evenly spaced and penetrate the lumber sufficiently. Apply gussets on both sides of the truss for maximum strength.
Step 6: Allow Adhesive to Dry and Inspect Allow the construction adhesive to dry completely according to the manufacturer's instructions. Once the adhesive is dry, inspect the truss for any loose joints or weaknesses. Add additional screws or nails if necessary to reinforce any areas that seem weak.
Step 7: Repeat for Additional Trusses Repeat steps 2-6 to build the remaining trusses needed for your shed roof. Ensure that all the trusses are identical in size and shape to maintain a uniform roofline. Using one completed truss as a template for the others can help ensure consistency.
Conclusion Building your own shed roof trusses can save you money and provide a sense of accomplishment. By following these steps carefully and using quality materials, you can create strong and reliable trusses that will support your shed roof for years to come. Remember to always prioritize safety when working with power tools.
``` How To Build A Shed Roof Truss
 insideactor.coesca.com
 Building Gable Roof Shed Trusses
www.pinterest.com How To Build A Shed Roof Truss
 insideactor.coesca.com

0 komentar:
Posting Komentar